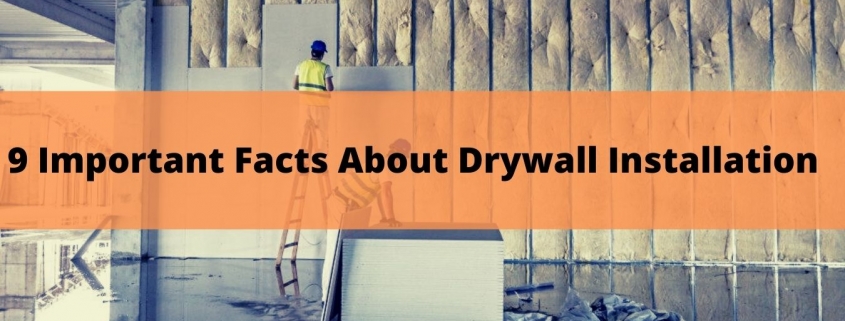
Drywall has transformed the way walls and ceilings are covered. With drywall, it takes a fraction of the time to build a wall. Installation of drywall is not that hard, two pros can cover a fourteen-by-eighteen-foot room in about a couple of hours. Working this fast takes practice and specialized tools of course. But hanging drywall is not all about speed. Getting the job done accurately means using the precise length screws, balancing the panels so the joints don’t line up, and making certain that cables and pipes are not exposed to punctures. So, if you have decided to install or hang drywall on your own, there are a few things that you need to take care of and you need to know some facts necessary for installing drywall.
What is drywall?
Drywall is also known as sheetrock or wallboard. Drywall was developed to replace wet plaster walls. It consists of a thin layer of plaster inserted between two pieces of heavy paper made into standard size panels four feet by eight or twelve feet. Pros cut panels to fit, then spike or rivet them to the frames. Installing drywall requires accurate dimensions and cuts to fit rooms in small spaces above doors or under windows. Installers also cut holes in the panels for electrical openings and plumbing pipes.
Drywall is available in three basic thicknesses:
- Five by eight inches is the largest and most soundproof
- Three by eight inches is best for covering existing walls
- One by four inches is the option for curved walls and arches.
Remember, when hanging drywall, the end goal is to create as few seams as possible.
Tools and materials you will need:
- T-square
- Sharp utility knife (additional blades recommended)
- Screw gun or screw adjuster
- Drywall screws
- four-inch and an eight-inch drywall knife
- Caulking glue gun
- Drywall router (big jobs) or hole saw (small projects)
- Sanding pads or small sanding blocks
- Sheets of plasterboard
- Drywall screw box
- Angles for outside corners
- Roll of joint tape
Start With Precise Dimensions
For the installation of drywall, the first thing to do when hanging or installing drywall is to take a pencil and mark the location of the vertical studs on the floor and ceiling. Knowing the correct location of the frame posts will help you position the screws correctly and you won’t waste time removing missing screws from the frame. This will streamline the attachment of the drywall to the border. Ensure that all insulation work and vapor blockade fitting are complete before you start hanging drywall. While drywall is often installed vertically by a pro so that long joints line up along a stud or rivet, this is not the usual professional method. As an alternative, start from the upper corner of the room and install the panels parallel with the top edge contrary to the ceiling or roof. Professionals often install the top row of boards first.
Cover Your Roof
With an assistant, lift the first panel in a corner of the ceiling or roof. Edges should be vertical to strapping or joists and one end should fit snug against the wall. While the helper holds the panel, drive five screws, evenly spaced, in a line across the width of the panel and into the joist or strip closest to the center of the panel. Use the symbols on the top plate to help line up the screws. Keep the bolts at least half-inch from all ends. Insert the screw heads a little below the surface of the paper, but not so deep that they snap off.
Be Careful When Placing The Panel
Begin clipping by driving a few screws or nails through the ends and through the midpoint of the panel to hold it in place against the studs. Use drywall bits because they help drive the drywall screws into the drywall enough so that they can easily get muddy. The screws should be placed far enough to crack the surface of the drywall, but not far enough to break the surface of the paper. Drywall guns have adjustable clutches that allow you to control the depth of the bit. If using one by two-inch-thick drywall, use one by two-inch long screws or nails, for drywall three by four inches thick, use three by eight screw inches.
Cover The Drywall
Mark all stud locations on adjacent ceiling panels. For Drywall Installation in Houston TX, use a tape measure to make sure the end of the first panel lands in the center of a stud; otherwise, cut the panel. With help, hold the board indifference to the studs so that one corner touches the ceiling panel and one end fits tightly against the in-line wall.
Put On The Glue
Once you have cut the board to size and ready to install, apply a drop of adhesive to each stud. This will decrease the number of screws needed, provide additional soundproofing, and result in a stronger, flatter wall.
Plug Drywall Joints
Using mesh or net tape that hides joints more effectively than paper tape, cover vertical seams or butt joints first, pressing firmly down with a drywall knife. Then cover the horizontal seams or joints. In the end, cover the corners.